3 Environment Setup
This section overviews some critical setup for your general computing environment. You must use a Mac or PC computer, not a tablet. The practice tasks at the end of this section guide you through saving and working with a local or cloud version of this tutorial.
All of these skills will also be shown in subsequent sections, since they are required to efficiently perform that section’s skills. However, if you work through this section first, your work on this tutorial will be coherently packaged and saved. To track your progress, you can put an xx or other mark in the section header of sections you feel comfortable with.
3.1 Theory
The default settings on many programs are designed for simple usage, not for more advanced use. For example,
- some Mac mice/trackpads do not have easy access to a right click button,
- the path for your files is often hidden by default, and
- the navigation pane for Word and Google Documents is sometimes hidden.
The following subsections guide you through some of the most important modifications to your computing environment.
Window management
It is often efficient to arrange your application windows so that two or more are easily visible on the same screen. This lets you see the origin of your information at the same time as you see the new location for your information. When information is visible at both its origin and destination, you can copy-paste and drag-drop that information efficiently. This helps manage files and folders, copy and paste information from a browser into a Google Doc/Word document, simultaneously view tutorials and apply the skills in real time, and much more.
This may take some practice. Typical modern computer users swipe between screens. While this is useful for consuming information, it can be impractical for creating and managing information.
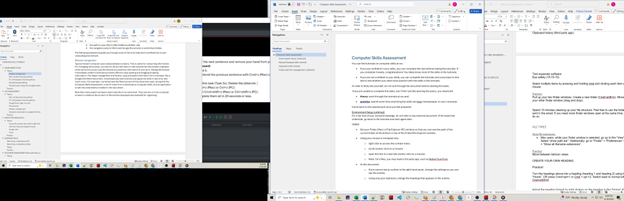
Note that many expert computer users take this to an extra level. They use two or more computer screens to enhance the amount of information displayed and available for organizing. For example, I currently have the Word version of this document open, along with the Computer Skills Assessment, a set of notes from a workshop on computer skills, and an application to edit the screen grabs included in this document. These documents are organized across two screens for easy access to information.
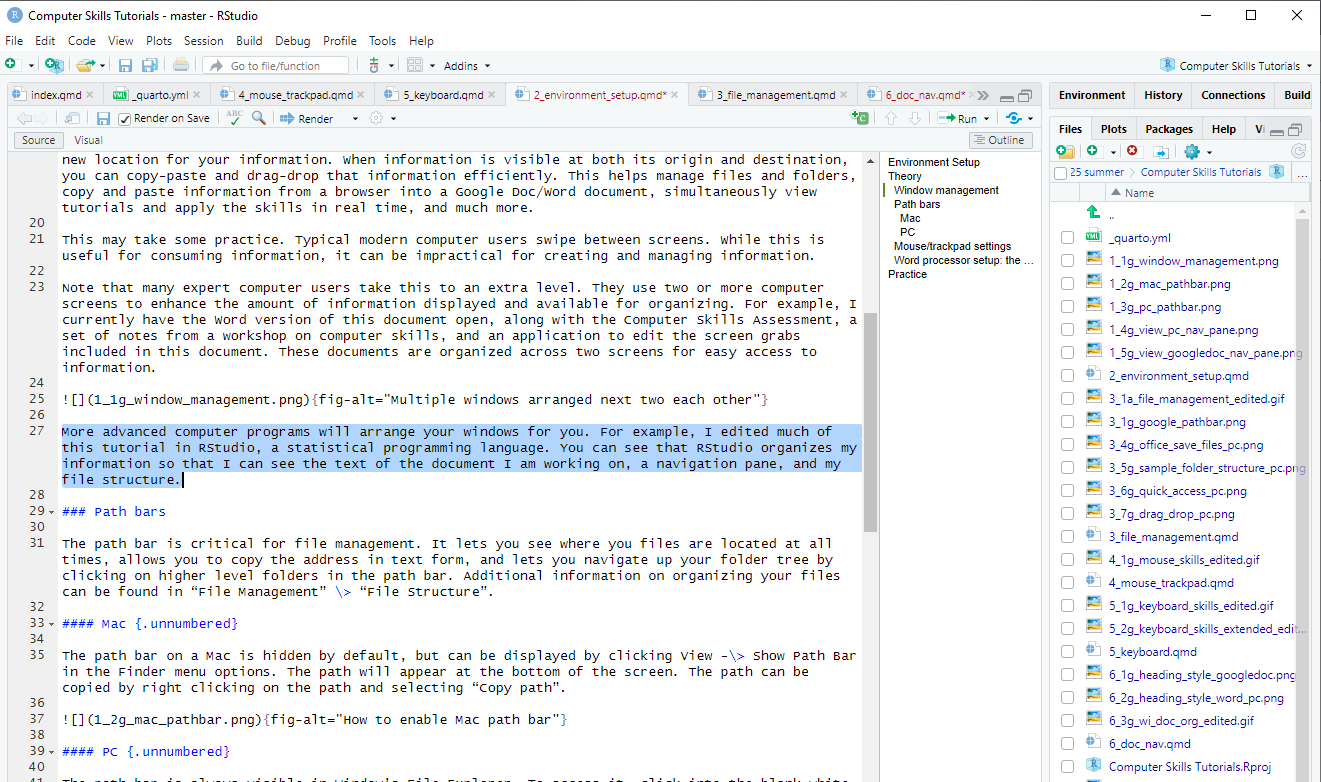
More advanced computer programs will arrange your windows for you. For example, I edited much of this tutorial in RStudio, a statistical programming language that also creates webbooks. You can see that RStudio organizes my information so that I can see the text of the document I am working on, a navigation pane, and my file structure.
Path bars
The path bar has many uses. You can:
- see where your files are located at all times,
- copy the location of your files in text form, and
- navigate up your folder tree by clicking on higher level folders in the path bar.
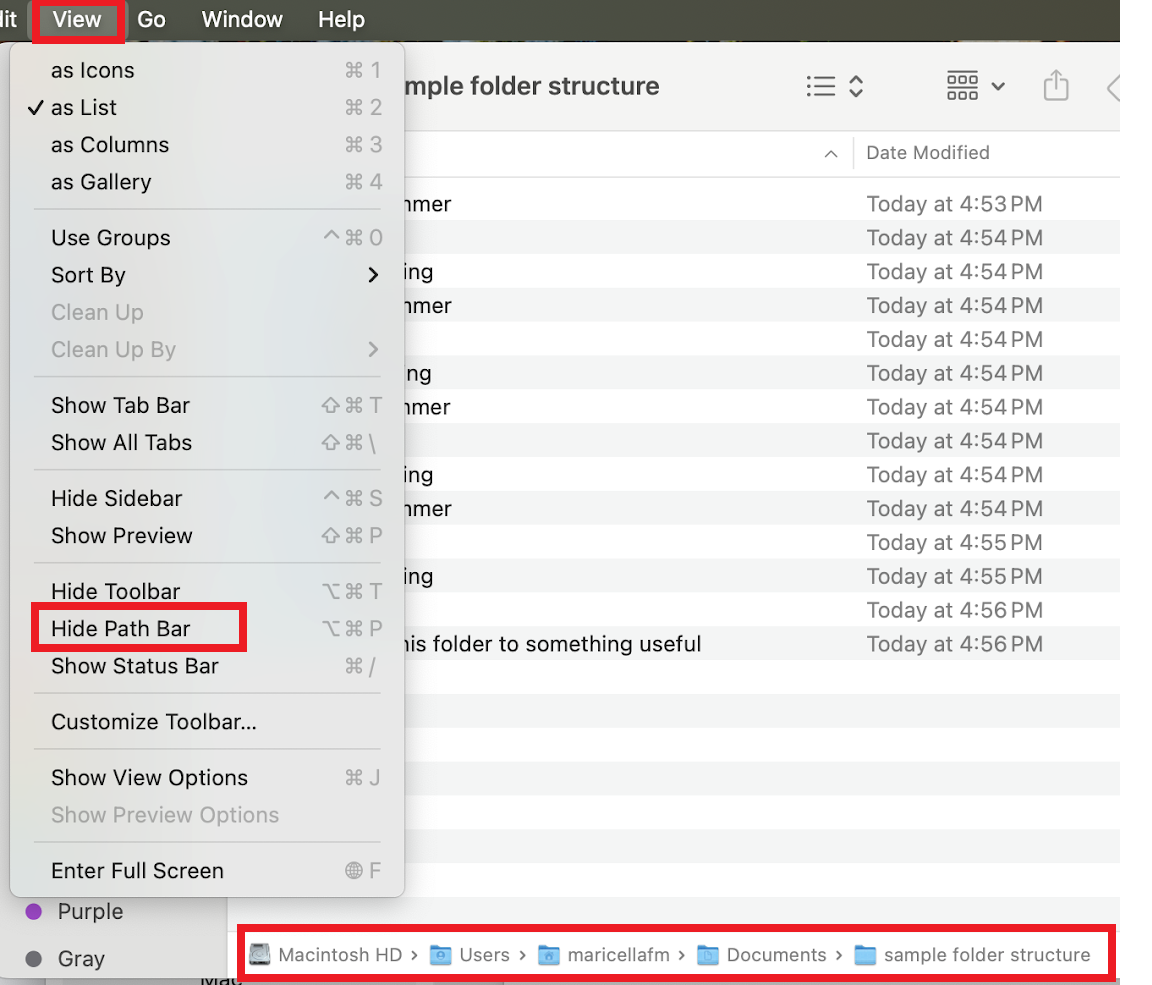
The path bar on a Mac is hidden by default. You can change this default by clicking View -> Show Path Bar in the Finder menu options. The path will appear at the bottom of the screen. Navigate up your folder structure by clicking on folders in the path bar. Copy the path address by right clicking on the path and selecting “Copy path”.
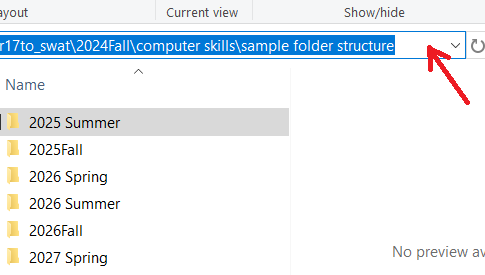
The path bar is always visible in Window’s File Explorer. Navigate up your folder structure by clicking on folders in the path bar. Copy the path address by clicking into the blank white space next to the path bar and pressing Ctrl+c.
Additional information on organizing your files can be found in “File Management” > “File Structure”.
Mouse/trackpad settings
- Search for your mouse/trackpad settings by searching for “Mouse Settings” in your spotlight search. See if you want to adjust any settings.
- The mice/trackpads for Mac computers may not have easy access to a right click. You can compensate by pressing Ctrl+click, but this is inefficient. To enable right clicks, you can adjust your mouse settings, or install a third-party app such as BetterTouchTool.
Word processor setup: the navigation pane
Document headers provide many benefits, including:
- idea organization,
- document navigation by clicking on the relevant part of the outline in the side panel,
- interactive tables of contents,
- document accessibility.
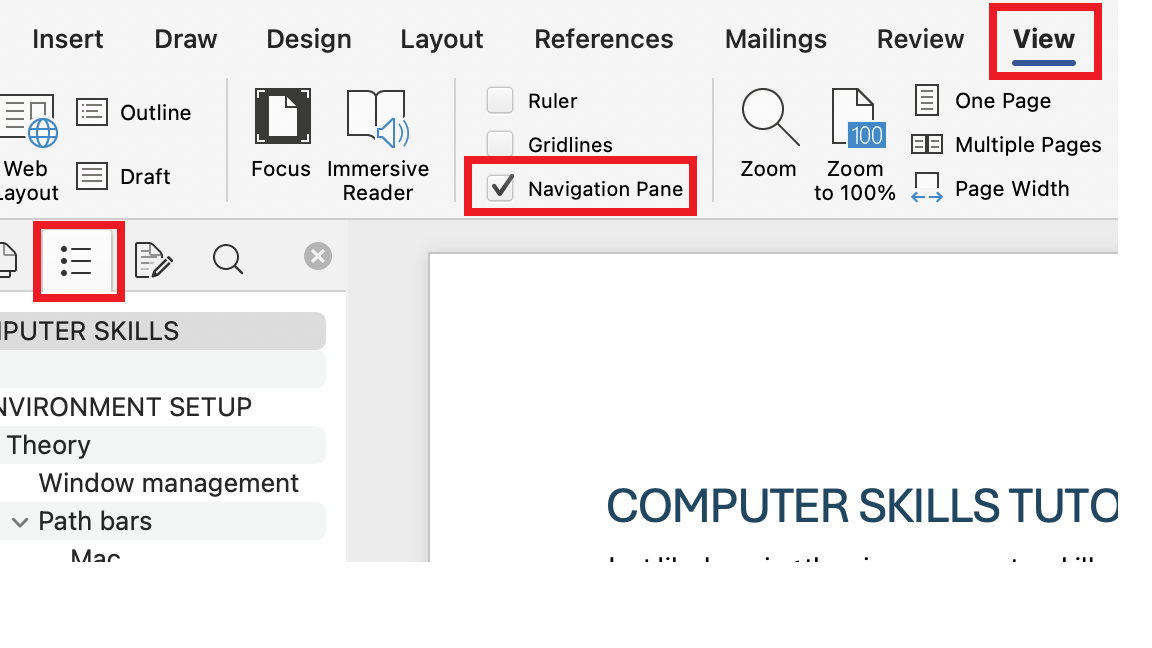
In Microsoft Word, you can see a navigation pane with all headers, which creates an interactive table of contents. To access the navigation pane, go to the View ribbon. In the “Show” section, click “navigation pane”. Make sure you are in the Document Map (Mac) or Headings (PC) section of the panel on the left
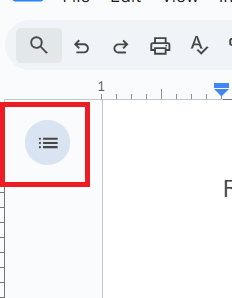
Google Docs opens the navigation pane by default. You may need to click the list icon at the top left of your screen.

3.2 Practice
Tasks:
- Download the Microsoft Word version of these tutorials at this link.
- Save the tutorial to a logical place on your computer or a cloud environment such as Google Docs. The section on “File Structure” under “File Management” may be helpful.
- Open a File Explorer (PC) or Finder (Mac) window that shows “Computer Skills Tutorials.docx”.
- Duplicate this file by copying and pasting it, ideally with your keyboard.
- Rename your copied file to include the date at the end. For example, it could be “Computer Skills Tutorials_2025-06-17.docx”.
- Open the document, either in Google Docs or Microsoft Word (not Apple’s Pages). If you are very comfortable with a specialized text editor (not Apple’s Pages), feel free to use it.
- Ensure that the navigation pane is open and visible on the left side of the screen.
- Start working through the next sections!